Содержание
Creating a chat or broadcast
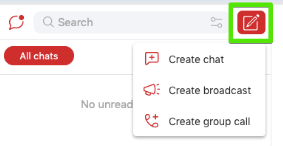
In the “Chats” panel, click on the “Create” icon next to the search bar and select “Create chat” or “Create broadcast”.
You will first be asked to add users to the chat/broadcast.
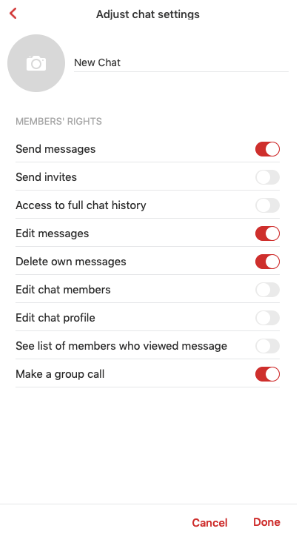
To get to the settings, click “Next”, enter a name, select a group for the chat and assign user rights for members (during chat creation only).
Next, click “Done” and your new chat/broadcast will appear in the list of chats.
Appointing an administrator/moderator
One or several chat members can be administrators or moderators.
To give a user admin/moderator rights, the following steps must be completed by the chat owner:
1. Add the prospective administrator/moderator to the chat, if he/she is not in it already.
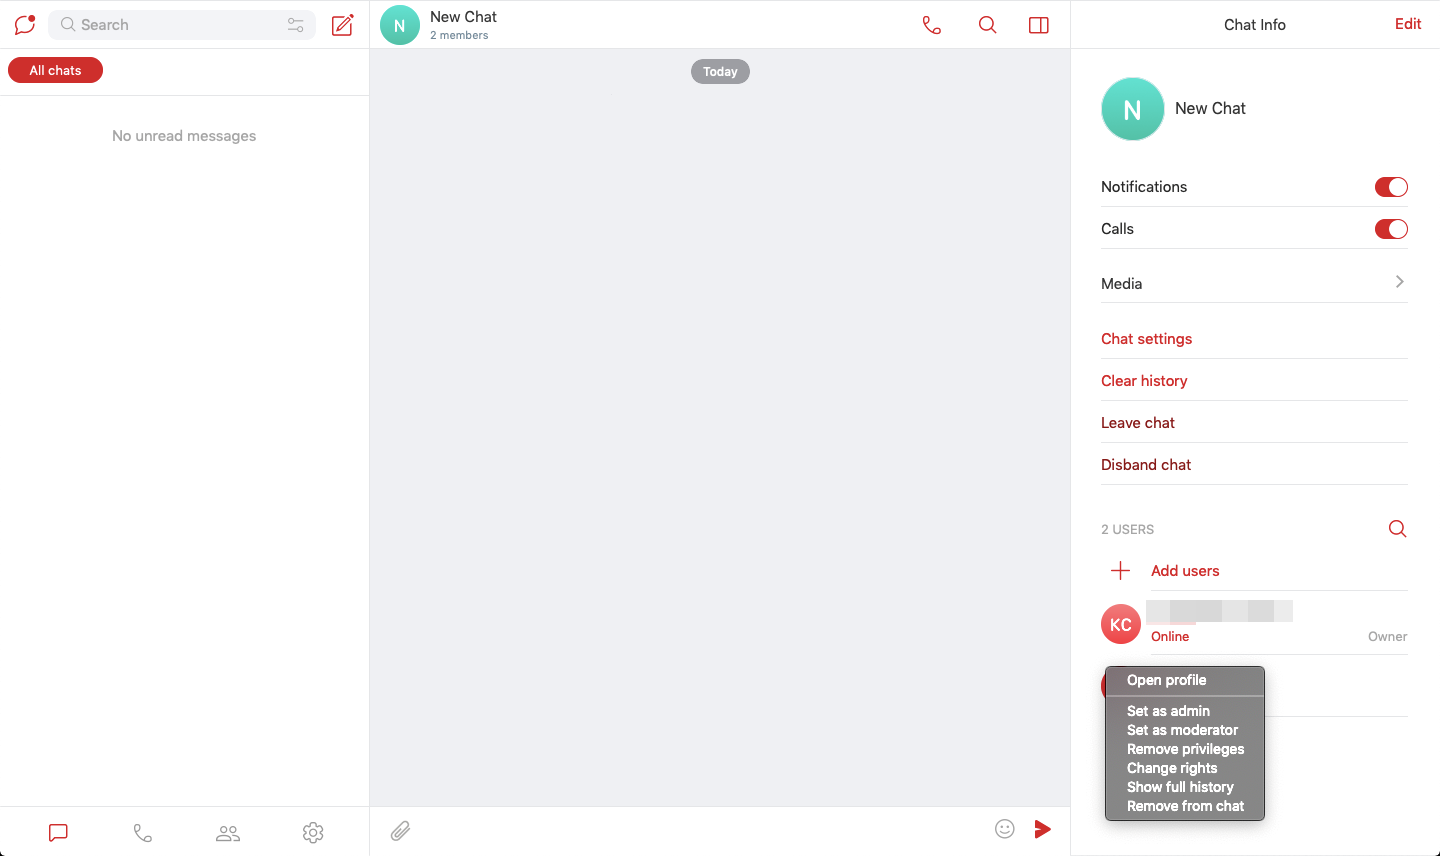
2. Open the information window, then in the “Members” section, click on the user who you want to set as admin.
3. A list will appear: select “Set as admin”/“Set as moderator”.
4. Next, use the switches to set user rights.
Changing user rights for members of a chat
Go to the information section in a chat, click on a member who you want to change the user rights for, and select “Change rights”.
Changing members’ rights in a chat
When you create a chat, you are asked to set user rights for chat members.
- Send messages
- Send invites
- Access to full chat history
- Edit messages
- Delete own messages
- Edit chat members
- Edit chat profile
- See list of members who viewed message
- Make a group call
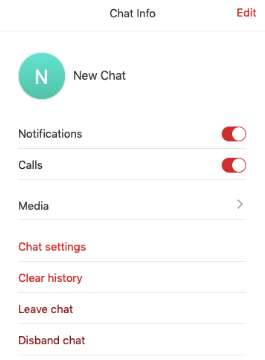
If you wish to change the existing user rights, go to the information section and select “Chat settings”.
Adding a chat to favorites
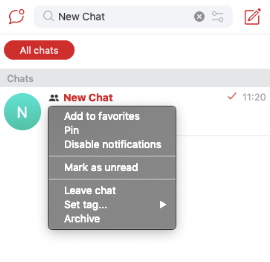
Click on a chat. A menu will appear: select “Add to favorites”. The chat you select will appear above all the others in your list of chats.
To remove a chat from favorites, follow the same procedure, but select “Delete from favorites”.
How to pin/unpin chats
In your list of chats, click on the chat you wish to select, and press “Pin”/“Unpin”.
How to enable/disable notifications in a chat
In your list of chats, click on the chat you wish to select, and press “Enable notifications”/“Disable notifications”.
Adding members to a chat
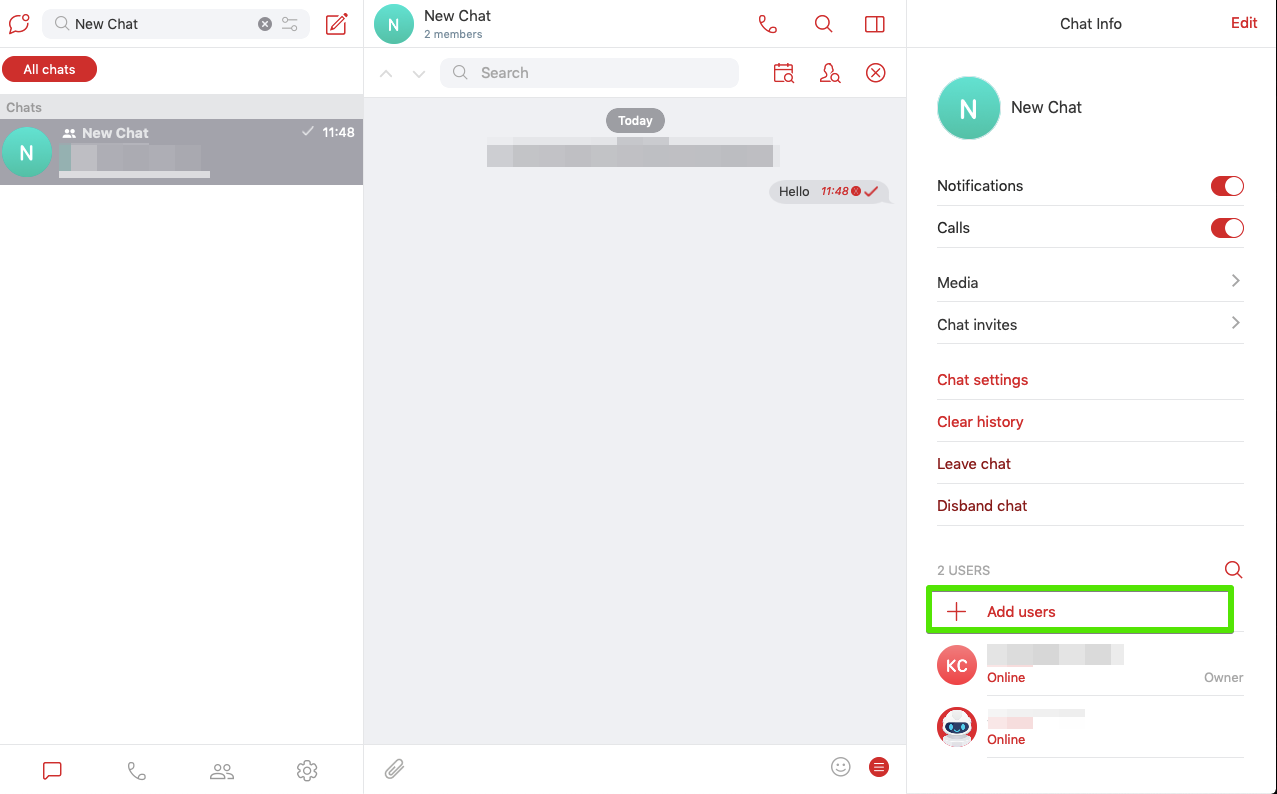
Adding members. Open a chat and go to the information section. Under “Members”, click ![]() to add members. A list will appear: select the user you wish to add to the chat.
to add members. A list will appear: select the user you wish to add to the chat.
Inviting members to a chat. When you create a chat, enable “Send invites”. If the chat has already been created, go to the information section and select Chat settings → Send invites.
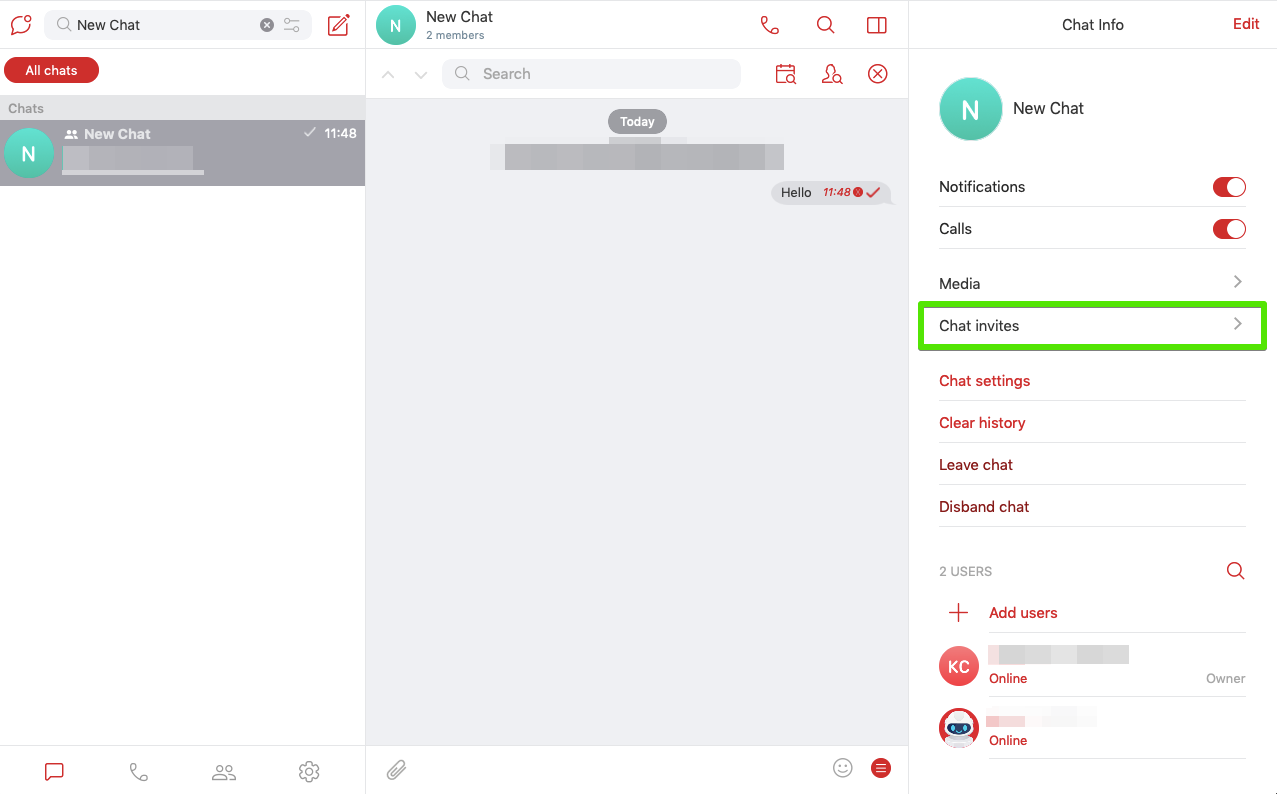
Sending invites. Open a chat and go to the information section.
Select “Chat invites”. In the next window, click ![]() . Choose a member to invite by putting a check mark next to their name.
The user will get a notification about joining the chat.
. Choose a member to invite by putting a check mark next to their name.
The user will get a notification about joining the chat.
If an invitation is sent by mistake, it can be canceled.
How to show the chat history to a new chat member
Go to the information section of the chat. Click on the user who you want to be able to view the chat history, and then press “Show full history”.
How to leave or delete a chat
In your list of chats, click on the chat you wish to select, and press “Leave chat”.
![]() Only the owner has permission to delete a chat.
Only the owner has permission to delete a chat.
Go to the information section of the chat and select “Disband chat”. All members will be removed from the chat and the chat will be deleted.
Sending chats to Archive
Right-click on a chat, and select “Archive” in the menu.
What is a group? How to create one
Chat grouping is recommended for people who have a lot of chats on different subjects.
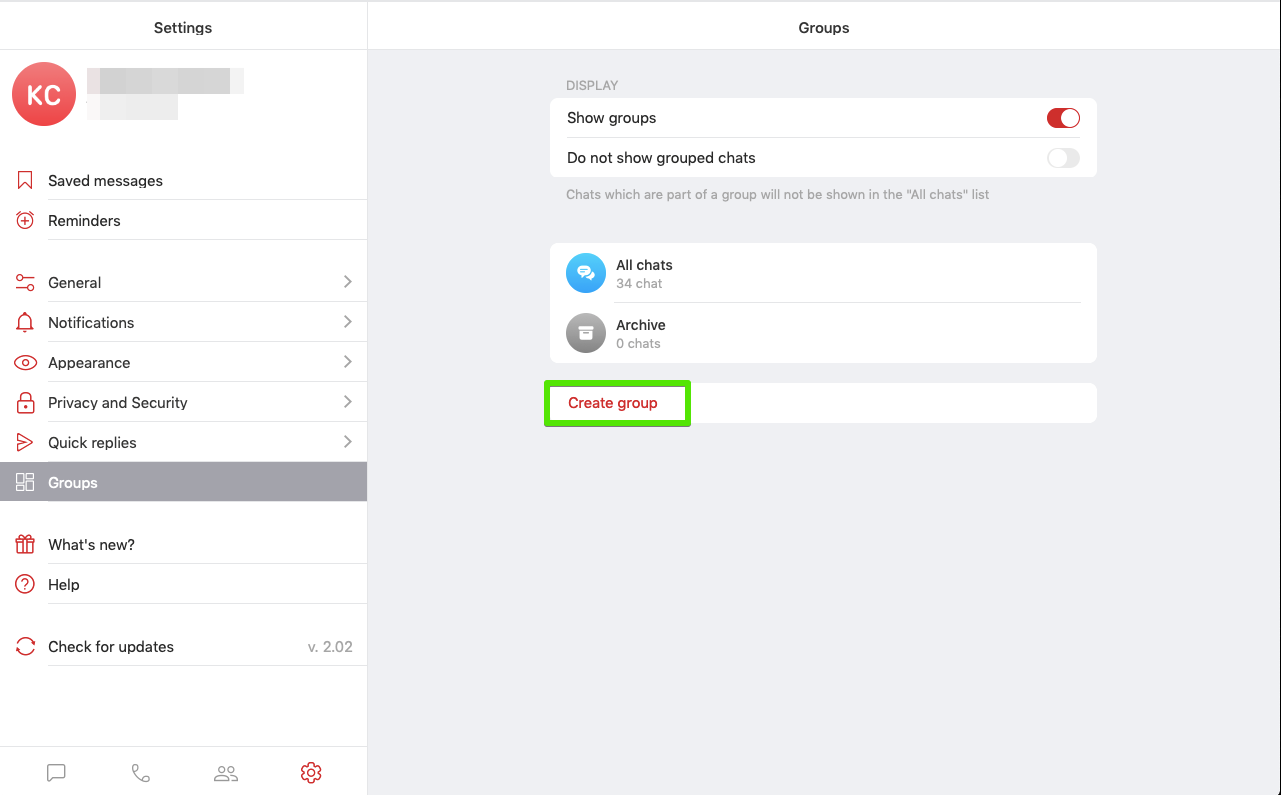
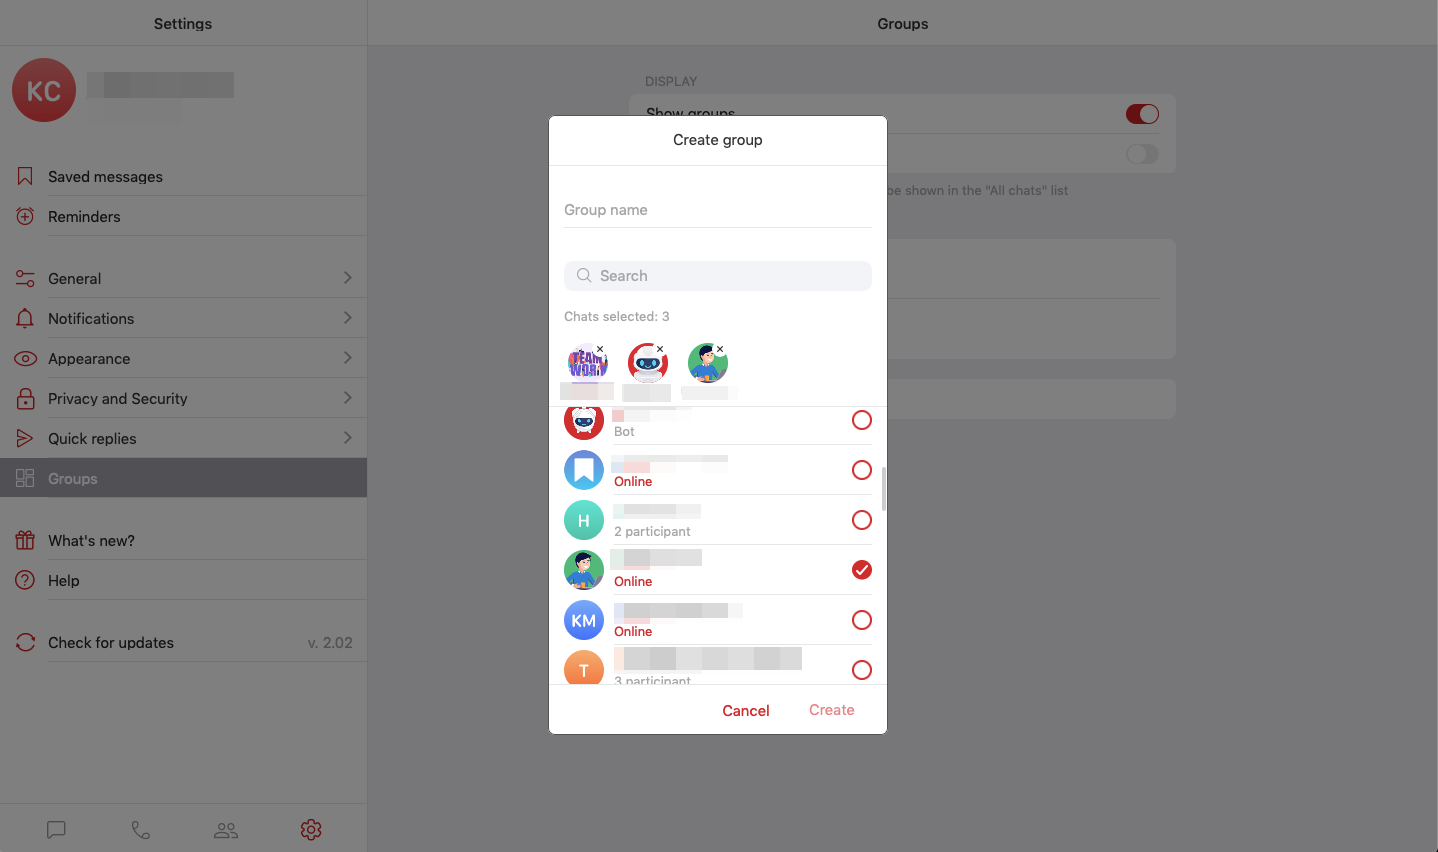
To group your chats, make sure that “Show groups” is enabled (Settings → Groups).
Creating groups. Click ![]() . In the “Groups” section, click “Create group”, enter a group name and select the chats that you want to add.
. In the “Groups” section, click “Create group”, enter a group name and select the chats that you want to add.
Renaming chat groups
In the “Chats” panel, click on a group to open the menu options and select “Edit”. A window will open: enter a new group name and save your changes.
Deleting chat groups
In the “Chats” panel, click on a group to open the menu options and select “Delete”.
Adding chats to a group
In the “Chats” panel, click on a group to open the menu options and select “Edit”. A window will open: put a check mark next to the chats you wish to add to the group.
Save your changes.
How to search for messages in all chats
In the “Chats” panel, type a key word in the search bar. Search results will be shown in the chats panel.
Click on the cross to clear the search bar.
How to filter chats
Filter by unread messages. In the “Chats” panel, click ![]() .
.
Filter by tags. In the “Chats” panel, click ![]() and select a search color.
and select a search color.
